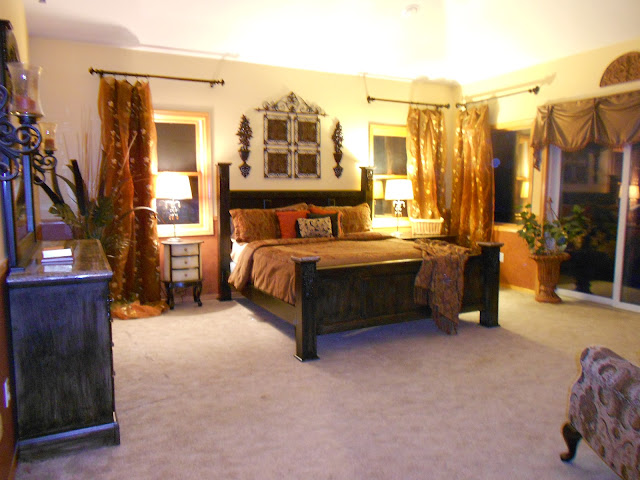
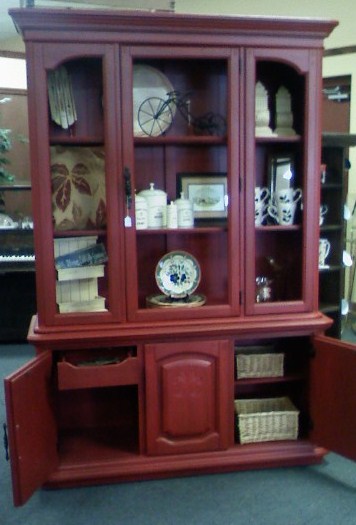
Here is a beautiful Bedroom set that had great lines and embellishments, but the color was really outdated. I painted it with a black brushed wash, which over the light color of the furniture turned out with a very cool rustic old world finish that really makes this look like a high end set. In actuality this is a pretty inexpensive set and is not even real wood! Crazy what paint will do :)
DIY ~ Vintage Home
Photos, Ideas & Money Saving How-To Tips for Creating "HOME" ~ a reflection of You.
VINTAGE [vin-tij] Definition-Superior ~ Part of Speech -adjective ~ Synonyms-classic, select, rare, best
Saturday, February 25, 2012
FAMILY PHOTO COLLAGE WALL
Good morning! Here is a great idea for a big over the stairs wall and all of your favorite family pics!
I started with a large shelf purchased for $7 from a garage sale, a couple of old shutters and a group of picture frames in different sizes and colors also purchased on the cheap, and a large old window that was sitting in my garage. I still have a few touches to add but wanted to share with you now. I will post another picture when it's done in a couple of days!
Hang a large shelf in the center of the wall just above where your railing is. You can add shutters or iron pieces to flank the shelf. (These shutters would be very easy to make with a couple of 1x4s if you don't find any real shutters.) Pull the backing off of all the picture frames and paint the frames all the same color or a couple of coordinating colors. Glue the glass into the picture frames with a hot glue gun. Then attach your photos to the back side of the glass facing forward. ( I actually used a child's glue stick and literally just a dab on each corner of the front of the pictures.) Do the same with the pictures onto the back of the old window panes.
When you hang the pictures keep the outer most frames below the shutters and in between the outer edge of the shutters as seen in the picture. Start by hanging the largest frames first and then work the smaller frames in between, staggering the layout. You may want to lay the frames out on the floor for your pattern before you start putting holes in the wall.
My wall still has a few empty frames as I wanted to add some recent pictures to it as well. I added a second window frame below the shelf as well. My family loves this wall, and it is right next to our "family word wall" so we all enjoy stopping for a moment in the once dark and boring hallway by the stairs. :)
Tuesday, February 7, 2012
A SPECIAL REMINDER
I spent a lot of time today thinking about how much my family means to me. Life throws so many ups and downs at us and as hectic schedules overtake us it is easy to forget how important it is to remind our loves ones of what they mean to us. My husband's grandpa passed away yesterday, he was 99 years old. He was an amazing man who was sharp as a tack right up to the end. His face was always lit with a smile, and his love for his family was evident even as the years brought him ever closer to 100. I decided that I wanted to do something that would serve as a reminder to us each and every day of the importance of our family and how blessed we are to have each other. We love you Grandpa, you will be dearly missed.
Here is our Family Word Wall ~
Here is our Family Word Wall ~
Saturday, February 4, 2012
BEFORE AND AFTERS
Good Morning, and Happy Saturday! Here are some before and after pictures of some furniture pieces that had great potential but needed some transforming. ENJOY!

 |
| Vintage French provincial Dresser With Hutch Paid $60 |
 |
| AFTER: Painted Main Piece Lime Green and drawers distressed white. |
 |
| Double Arched Antique Hutch Top with Metal Door Grids |
 |
| Vintage Buffet |
 |
| AFTER: Pieces put together and whitewashed then distressed. |

AFTER: Painted Black with Distressed Edges and original hardware.
Old Magazine Table - Paid $7
AFTER: Black Brush Finish left wood showing through, new knobs and distressed edges.
Vintage End Table with Drawer - Paid $12
AFTER: Sage Green Distressed Finish
Vintage 70's One Piece Hutch
AFTER: Gray/Green Spray Finish with Black Dry Brush Detailing. Bottom Doors and Glass Removed. Was made as a display piece for a business.
Mid - Century Hutch - Paid $50
AFTER: Painted with a Rustic Old World Finish. Doors Removed. Painted for a rustic/log home.
Thursday, February 2, 2012
Here is a great way to re-purpose old doors. I am using these as idea boards in the office I am redoing in my home, and I love the way they turned out!
HERE'S THE HOW-TO :
HERE'S THE HOW-TO :
First I cleaned the two doors and laid them flat for painting. I left the background white.
Assuming they were probably painted with lead paint, I chose not to sand and distress them.
Instead I used a
metal grid as a stencil on the outer part of the doors to make a diamond
pattern with brown paint. Once the
pattern was applied to the doors with a paint brush, a simple light brush
stroke up and down the doors softened the pattern and gave it a worn look. I added black antiquing around the
edges by starting at the edge and very lightly brushing toward the middle. This gives the finish the look of true aging. On the center panels I did a quick color wash by roughly moving the brush around the area and up and down the inside of the panel edges with a touch of water mixed with the same brown paint I used on the edges.
I used two glass antique doorknobs, and two black coat hooks
finished the project. I then hung the
doors side by side on the wall, and added a piece of iron scroll work to the top
to tie the doors together.
This would make the perfect entry way piece as well. Just add extra hooks for hats and coats. Looks great with just one door too! Good luck, and make sure to share your
comments and photos with me!
The office is a work in progress, so check back for more photos this week as I finish the job :)
Wednesday, February 1, 2012
WELCOME POST
Welcome to the DIY Vintage Home Blog! This is the very first post for our site! I am so excited to share my love for design
and all things up-cycled with you all.
My sincere hope is that you can use some of my information, techniques
and ideas to create a home atmosphere that is just right for you and your loved
ones! Imagine enhancing your home while
spending little or no money, all because you picked up a few tips to use old
items in new ways! Be prepared to get
daring with a paint brush, and get ready to look at your surroundings and
things you have laying around or in storage, in a totally new light. You might be surprised to find that you
already have many of the things you need to transform your spaces into inviting
and functional “real living” rooms.
Enjoy the journey!
Pam
Subscribe to:
Comments (Atom)


